
What is our process for installing mezzanine floors?
Quick Answer
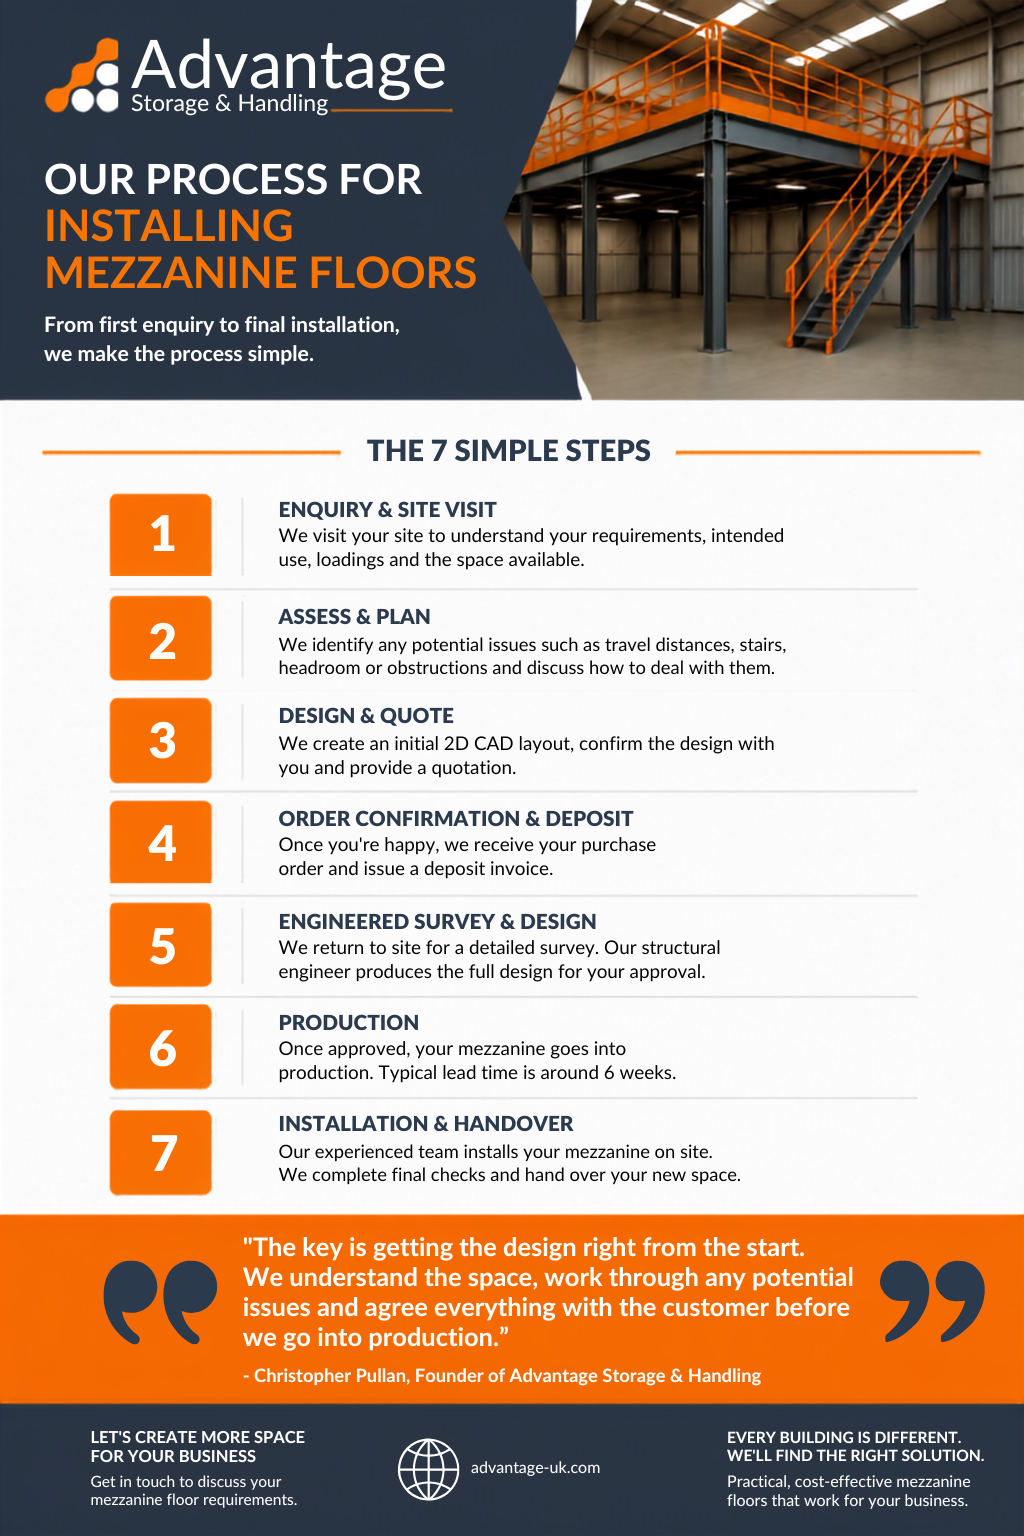
Our mezzanine floor installation process starts with a site visit to understand your space, requirements, intended use and loadings. We also identify potential building control considerations, including stair positions, travel distances, headroom and obstructions.
From there, we create an initial 2D CAD layout, confirm the design with you and provide a quotation. Once approved, we carry out a detailed engineered survey and produce the structural design for your sign-off.
After final approval, the mezzanine goes into production. Our typical lead time is around six weeks from approved design to installation, largely due to steel manufacturing timescales.
Our installation team then completes the mezzanine on site, with Advantage managing the project from initial enquiry and design through to installation and final checks.
At Advantage Storage & Handling, installing a mezzanine floor starts long before any steel arrives on site. Our approach is a complete, project-managed process that takes a customer from their first enquiry through design, building control, manufacture and installation.
Every mezzanine floor is made to measure, so the process begins with understanding exactly what the customer needs from their space. We work closely with customers throughout, combining site surveys, CAD design, structural engineering and building control knowledge to make sure the finished mezzanine is practical, compliant and suited to the way the business will use it.
1. We start with your enquiry and a site visit
Once we receive an enquiry, the first step is to arrange a visit to the site.
This gives us the opportunity to talk through what the customer wants to achieve, where the mezzanine floor needs to go and, importantly, what it will be used for.
The intended use affects the design, so we also need to understand any required loadings. A mezzanine being used for storage, for example, may have different requirements from one being designed to create office, production or workspace.
The site visit also allows us to take the necessary measurements and properly understand the building rather than trying to design a solution remotely. Getting this detail right is important both for producing an accurate quotation and for understanding the space and what the customer is trying to achieve.
2. We identify potential design and building control issues early
During that initial visit, we are also looking for anything that could affect the design or building control approval.
That might include travel distances, the position of staircases, available headroom or existing obstructions within the building.
Rather than producing a design and dealing with these issues later, we discuss them with the customer from the outset and consider how the mezzanine could be configured around them.
Building regulations are a key part of the process because every mezzanine floor is subject to building control compliance and needs approval from an approved inspector. Our team has extensive experience in this area, so we guide customers through the requirements and design with compliance in mind from the beginning.
3. We produce an initial 2D CAD design
Once we are comfortable that we understand the requirement, we return to the office and prepare an initial 2D AutoCAD drawing.
This shows the immediate area, the proposed position of the mezzanine and key elements such as staircase locations.
The purpose of this drawing is not simply to make the quotation look more detailed. It gives the customer something visual to review and gives us an opportunity to check that we have properly understood what they want before the project moves any further.
This reflects our wider approach to design consultancy. We use CAD technology to create made-to-measure solutions and help customers visualise what they are getting before manufacture begins.
4. We check the design with you and prepare the quotation
We then take the proposed layout back to the customer and check that we have interpreted the requirement correctly.
Once that has been confirmed, we prepare the quotation based on the drawing and issue it to the customer.
We will then discuss the quotation, either over the phone or in person, so there is an opportunity to ask questions or clarify anything before committing to the project.
That collaborative approach is an important part of how we work. Advantage provides an end-to-end, made-to-measure service, and we work closely with customers throughout the design and installation process rather than simply supplying an off-the-shelf mezzanine.
5. The customer approves the project
If the customer is happy to proceed, we require confirmation in the form of a purchase order or a signed document confirming that the project is going ahead.
We then issue a deposit invoice.
The deposit is important because, once the project moves forward, we begin committing to the steel and other materials required for the mezzanine.
At this stage, however, the floor does not go straight into production. There is another, more detailed design stage first.
Are you ready to plan your mezzanine floor?
Tick off the key information that will help us understand your project and move it through design and installation.
6. We return to site for an engineered survey
After the order has been confirmed, we return to the site to carry out an engineered survey.
This is more detailed than the initial visit. A structural engineer becomes involved and prepares the detailed design for the mezzanine.
The structural design and calculations are essential because the floor must be designed around both the available space and the loads it is expected to carry. Our process includes providing a structural outline and the required calculations to make sure the mezzanine meets those space and loading requirements.
Our mezzanine floors are also supplied with structural certification, and Advantage works with reputable UK manufacturers to provide compliant, high-quality systems.
7. You approve the detailed design
Once the engineered design has been prepared, we send it to the customer for approval.
This is another important checkpoint in the process.
The customer can review the detailed drawing and either sign it off or highlight anything that needs to change. If something has been misunderstood, this is the opportunity to correct it before the mezzanine enters production.
We do not want to manufacture first and ask questions later. The design is discussed and agreed before work proceeds so that the final solution meets the customer’s requirements.
8. The mezzanine goes into production
Once the detailed design has been approved, we can place the mezzanine into production.
One of the key components is the cold-rolled steel used for the galvanised purlins. These are sourced from Kingspan and, based on our current process, Kingspan operates on a fixed lead time of around five weeks.
That means there is normally around a six-week period between approved detailed design and the start of installation: approximately five weeks for the purlins to be produced, followed by installation commencing around the following week.
Occasionally timings may vary, but completing the project significantly earlier than this is unusual because of that manufacturing lead time.
9. Our installation team comes to site
Once the materials are ready, our experienced installation team attends site and begins installing the mezzanine.
We focus on providing an efficient installation while minimising disruption to the customer’s day-to-day operation. For the wider project, Advantage coordinates the different elements involved so customers have a project-managed service rather than having to organise each stage separately.
The exact time spent installing the floor depends on the individual project. Every mezzanine is different, so there is no single installation time that applies to every job. Depending on its size and complexity, the physical transformation can take days or weeks.
10. We check the finished installation
Our involvement does not end simply because the structure has been installed.
As part of our full turnkey approach, project managers carry out site visits during installation to check that the work is being delivered correctly and in accordance with the design. We also complete a final walkthrough to make sure the customer is happy with the finished result.
Where the project requires more than the mezzanine itself, we can also take care of the finishing elements needed to turn the new floor into a functional space, including flooring, partitions, ceilings, lighting, safety equipment and other fit-out requirements.
A complete process from enquiry to installation
For us, installing a mezzanine floor is not simply a case of supplying steel and putting it together.
The process starts with understanding what the customer is trying to achieve. We survey the site, identify potential issues, produce an initial CAD layout, discuss and quote the design, then return for an engineered survey and detailed structural design.
Only once that design has been approved do we move into manufacture. From there, we coordinate the materials and installation before checking that the completed project has been delivered as intended.
That is what we mean by a turnkey service: working with the customer from first enquiry through to installation and beyond, with one team helping to manage the design, compliance and delivery of the project.